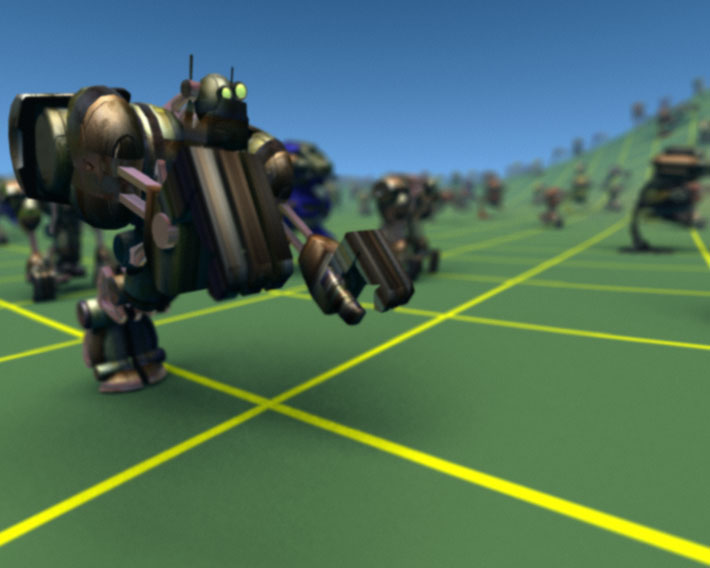
Load's a
robots!!
First off what we need is Lightwave 8.x
and HD-Instance v1.6.4 get your update from here: http://www.happy-digital.com also you'll
need to find a scene from your LW content CD called ApeRun52.lws as this is
our starting point. You should be able to find this in the folder
"Scenes\Robots\Apebot\".
Part 1,
Setting up your
Runner
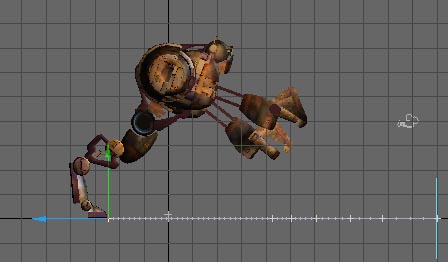
When you first load the scene switch to
Left view, by clicking the play button you can see this is a nice loop to start
with, but the problem is there is no forward motion. So we'll have to create
this. Turn up your grid type to 30x30 & grid
square size to 2m, this is on your "Display Options" panel.
NOTE This scene is 30fps! I
must stick to this through out the project, or you might end up with
fractional frames that can be a big pain in the bum.
Add a null and call it
"Foward_Motion",
go to frame 0 and line it up with the tip of the toes, do the same for frame
30.
Using
"Parent in place",
found on the "Preference"
panel; parent the object "motionObject" to
"Foward_Motion"
Add a new null, call
this one "Guide",
scale it's Y about 11, so you can see it, and at frame 52 place it at the tip
of the robots toe. Set this key at 0.
Now for the fun bit,
select the
"Foward_Motion"
null and at frame 52 move it to line up with the
"Guide"
null. Now go to frames 48, 45, 40 & 35 and line it up to the Guide here too.
You might want to do the same for the frames when the hands make contact with
the floor to, though in my sample I did not bother...
Open graph editor for
"Foward_Motion",
& set all the Z motion keys to Linear, also set Post Behaviour to
"Offset Repeat".
Now with Graph
Editor still open, open classic scene editor & select all objects for
the Robot, but for the null "Foward_Motion", go back to Graph Editor and click
on the Selection tab (Top left), and use "Get Layout Selected".
Now select all the Channels & set their Post Behaviour
to "Repeat".
Now set the end frame to say 1000,
and scrub through, you should now have a nice run cycle including it's Z motion.
If not go back to Graph Editor and make sure you've set the Post Behaviours
correctly for the robot.
We want the robot
to run on the spot for HD-Instance, since our Forward motion will come from
the Instance control objects. So be for we can save this scene we need to go to frame 0 and un-parent the
object "motionObject" from the
"Foward_Motion"
null. If you don't go to frame 0 you might end up with an unwanted keyframe if
"Parent in place"
is still turned on, in fact turn it off.
Save this scene as
"ApeRun52_loop-A.lws",
now open scene editor classic, using
"Shift Key Time for All Items...",
set the "Shift Frames by"
to -25 and save this scene as
"ApeRun52_loop-B.lws". At this
point I should tell you this is a way of adding random motion feel to the
final scene, so you could in fact create many offsets ranging from -45 to -15.
I guess a good number depends on the scene, for this example we're only having
two. If you want you could create more now, but keep the offsets negative as
you don't want the robot standing still at the start. :0)
2. Of Landscapes &
Robot tiles
Now for the modelling part, first in a
clean layer create a box with Width 4.7km, Height 0m, Depth 8.1km,
Centre X 0m, Y 0m, Z 2km, Axis Y & Segments set to X 32 & Z
60.
Hit the TAB key to make
this a Sub-D object, & name the surface
"Ground",
as you guessed it, it's the ground.
In layer 6, create another box
with Width 20m, Height 0m, Depth 20m, Centre X 0m, Y 0m, Z 0m, Axis Y
& Segments set to X 1 & Z 1. Surface
this as "Robot_Tile-A", set the colour to RED.
In layer 7, create another box
with Width 1.96km, Height 0m, Depth 2.5km, Centre X 0m, Y 0m, Z 1.26km,
Axis Y & Segments set to X 50 & Z 80.
Hit "k"
to kill the polygons so you're left with around 4131 points, these are your
robots!!
But first to remove the uniformed look,
open the Jitter plug-in (Should be found under Modify, or the shortcut key is
"Shift-J"),
Set the options to X 20m, Y 0m & Z 20m. As you
might have guessed some of the points are too close to each other so in order to
correct that use "Merge Points", with the settings of "Fixed",
Distance 21m. It might be better to use a higher value of around 25m.
Go back to layer 6 with layer 7 as the background, and run the
plug-in "Particle_clone", you should find this under the Multiply tab. This may
take some time so go put the kettle on. :0) Don't make the coffee yet...
Once this is done, run the plug-in
"Random Select LSC", set
this to "Polygon" at
50%, now you can go make a coffee as this plug-in can be a little slow. :0)
Cut the selected polygons & paste them in to layer 2, go
back to layer 6 and cut and paste them to layer 3. Surface them as
"Robot_Tile-B", set the colour to YELLOW.
The new layers 2 & 3 we now have are
the Instance control objects, it's these that we'll be moving over a bumped
landscape later with robots stuck to each one.
You may as well delete layer 7 now as we don't need this any
more. Save this object as
"Crowded_floor", and send to Layout...
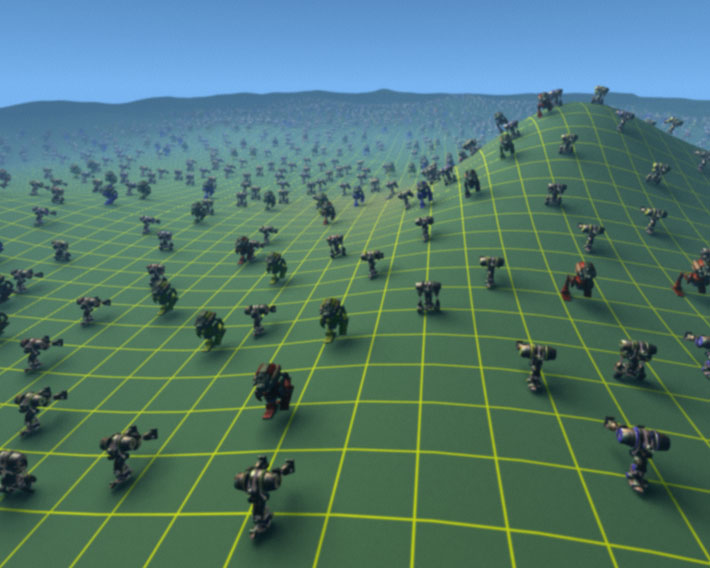
3. Run... there's a shed load of robots
coming!!!
Okay this is really where the fun begins, before I was just
lying to you. Make sure this scene is set to
30fps.
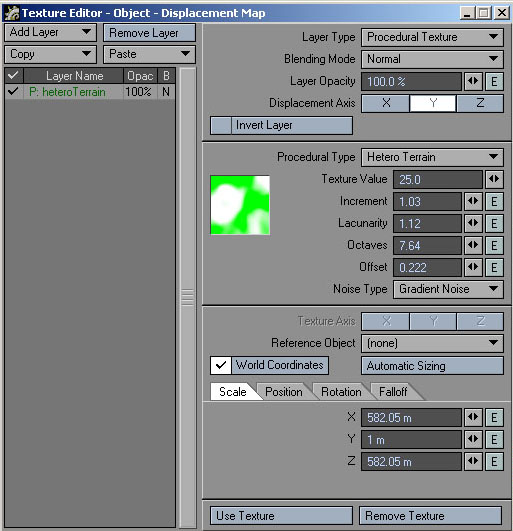
Select layer 1 of the
"Crowded_floor" object, open the "Object
Properties" set the Sub-D to first, render level to 6 or higher,
keep the display a 3 since we want to keep Layouts speed. Click on the
deform tab & then click the T for Displacement Map and set up as
image:
Note the fact the
"World Coordinates"
is turned on, this is very important as without it our robots will not be able
to stay on the ground & our control tiles would not work when animated.
Before you close this panel copy the surface layer for the
next step. Paste the surface layer to both displacement maps for layer 2
& 3 of the "Crowded_floor" object.
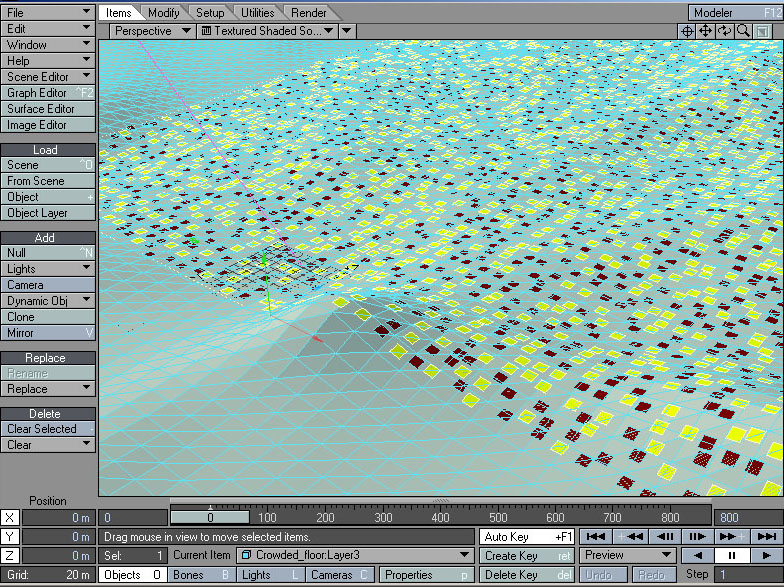
You should end up with all the objects looking like:
Using "Load
from scene" load "ApeRun52_loop-A.lws",
do this for "ApeRun52_loop-B.lws"
too.
With "Parent in place" still turned on
parent the object "Crowded_floor:Layer2"
to "Foward_Motion(1)", and
"Crowded_floor:Layer2" to
"Foward_Motion(2)",
making sure you're at frame 0.
Now when you scrub the scene you'll
see the red & yellow polygons slide over the landscape following the contours
of the landscape almost perfectly, if not then you've not turned on
"World Coordinates"
for the displacement maps.
This is why we un-parented the
Foward_Motion objects in
part 1, because we want the robots to run on the spot, that is so they stay on
their tile (red & yellow polygons). Otherwise they will just float off the
floor. :o)
It's time now to add HD-Instance!! But
first turn on for both layers 2 & 3 "Unseen by
Rays", "Unseen by
camera" & turn off all shadow options for these
objects.
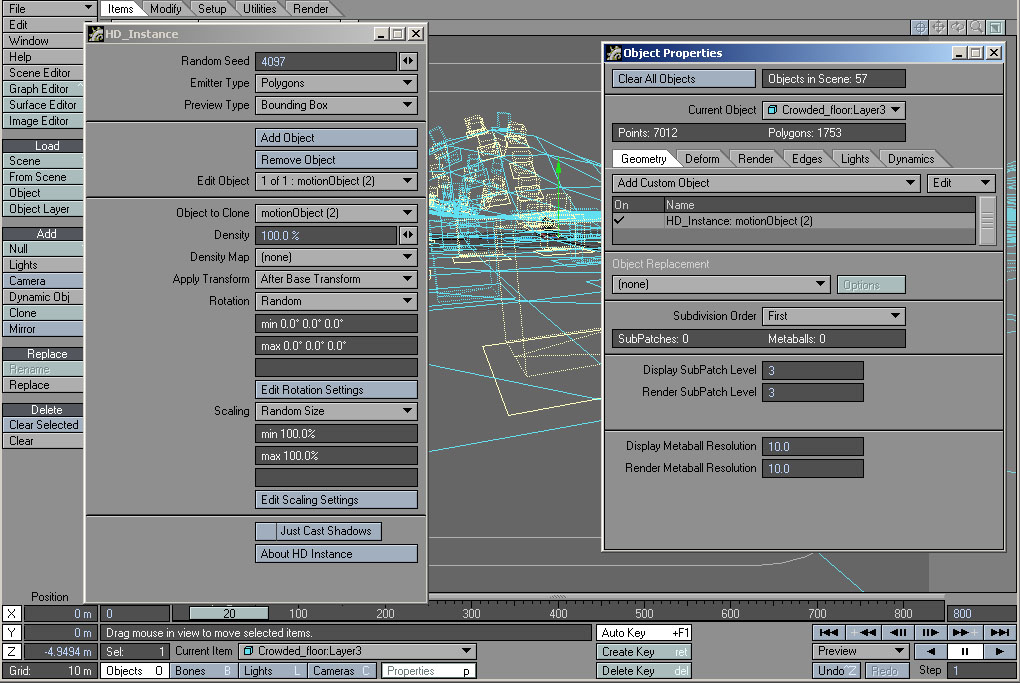
Select
"Crowded_floor:Layer2", open the properties panel
an add HD-Instance open it and set "Emitter
type" to Polygon,
"Object to clone" to
"motionObject(1)"
Do the same for
"Crowded_floor:Layer3", but
set "Object to clone"
to "motionObject(2)".
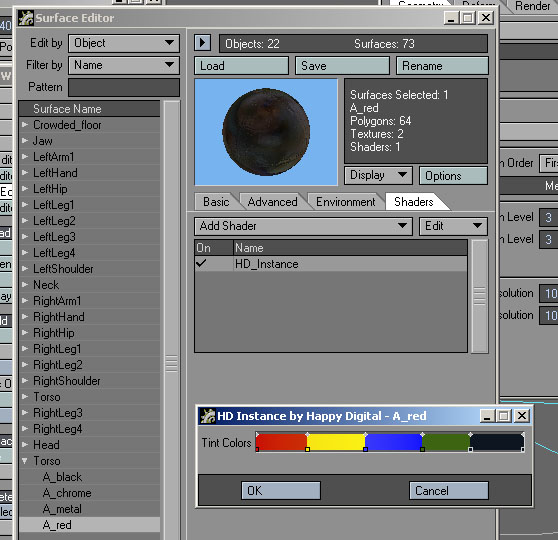
Next step is adding random colours to your robot's surface using
HD-Instance shader:
Once you've created one Shader you
can copy then paste it to other surfaces on the other objects, don't forget to
save the objects after! In mine I've used two keys very close together to
create the colour bands.
One thing to note, HD-Instance will
use the same random colour for any objects parented together & rendered in the
same instance. Very cool feature!!
You'll need to add the HD-Instance
volumetric plug-in, to do this open the Effects
panel and click on the Volumetrics
tab (ctr-F6), and then click on the "Add
Volumetric" and select "HD_Instance".
SAS Lite??
Yep you can add grass with SAS lite as HD Instance works just fine with this
plug-in. You can also use XDOF though I'm sure this will not work with SAS
Lite.
4. Lighting!
Someone commented that the shadows on my demo looked like another fancy plug-in, but no it's just
an area-light.
I placed my light at X -408m, Y 550m, Z
14.4m. H 64.8, P 57.3, B 0 & scaled it X 800, Y 800, Z 800. Quality was set to
4 & the RGB is set to R 255, G 237, B 196. I also turned on
"Shading Noise Reduction".
Due to a limitation in LW you can't
use Shadow mapped lights, they will have to be raytraced. Along with the fact
you can't cast god-rays with volumetric lights & HD instance or Hyper Voxels
either. Hopefully this will be fixed someday...
Take care now,
Shaun Lee Bishop.